Construction site photos: what to photograph in a renovation, stage by stage
Construction site photos of the services must be taken before the chases are closed: a wide shot, a close-up and a tape measure held against the wall as a reference.
 Giulio Palumbo SchiavonePhotographer · ENAC drone operatorPublishedUpdatedReading5 minWhatsAppLinkedIn
- 01Photograph the services before the chases are closed, with one wide shot, one close-up and a tape measure resting against the wall.
- 02For the before and after, choose your camera positions at the start and return to the same ones on every visit, without changing height.
- 03Save the photos with the date in folders by room or by stage: they go with the progress report (in Italy, the SAL) and are useful years later.
In this article
A building site changes every week. What is exposed today is behind plaster tomorrow, and once the work is finished the wall no longer shows what is inside. What remains is the photographs.
Why photograph a renovation while it is under way?
You are putting money and months of your life into that house, and every day something disappears from view. You drop by to see how things are going, and the room has changed since your last visit: the wall you remembered open is now closed. The stages follow one another: demolition, chases and services, screed, plaster and skim coats, floors and tiling, windows and doors, finishings. Each stage covers the one before. Think of the screed: one day the pipes run in plain sight across the floor, then the screed goes over them and nobody sees them again.
The photos of a house site that prove most useful are the ones taken a moment before something disappeared, even when the framing is crooked and the light is whatever there happens to be. The site supervisor uses them to check, and you use them to find a detail you only half remember.
What should you photograph before the work starts?
Before the work starts, photograph the existing state, room by room: it is the «before» for everything that follows. You can do it only once, because after the first demolition there is no way to redo it. Walk into each room as it is today and shoot from different angles, so that every wall can be seen. Then move closer to whatever you want to be able to find again: a crack, or a floor you have decided to keep. As soon as you finish, note down where you stood, because on every later visit you will return to the same spot.
How do you photograph the services before the walls are closed?
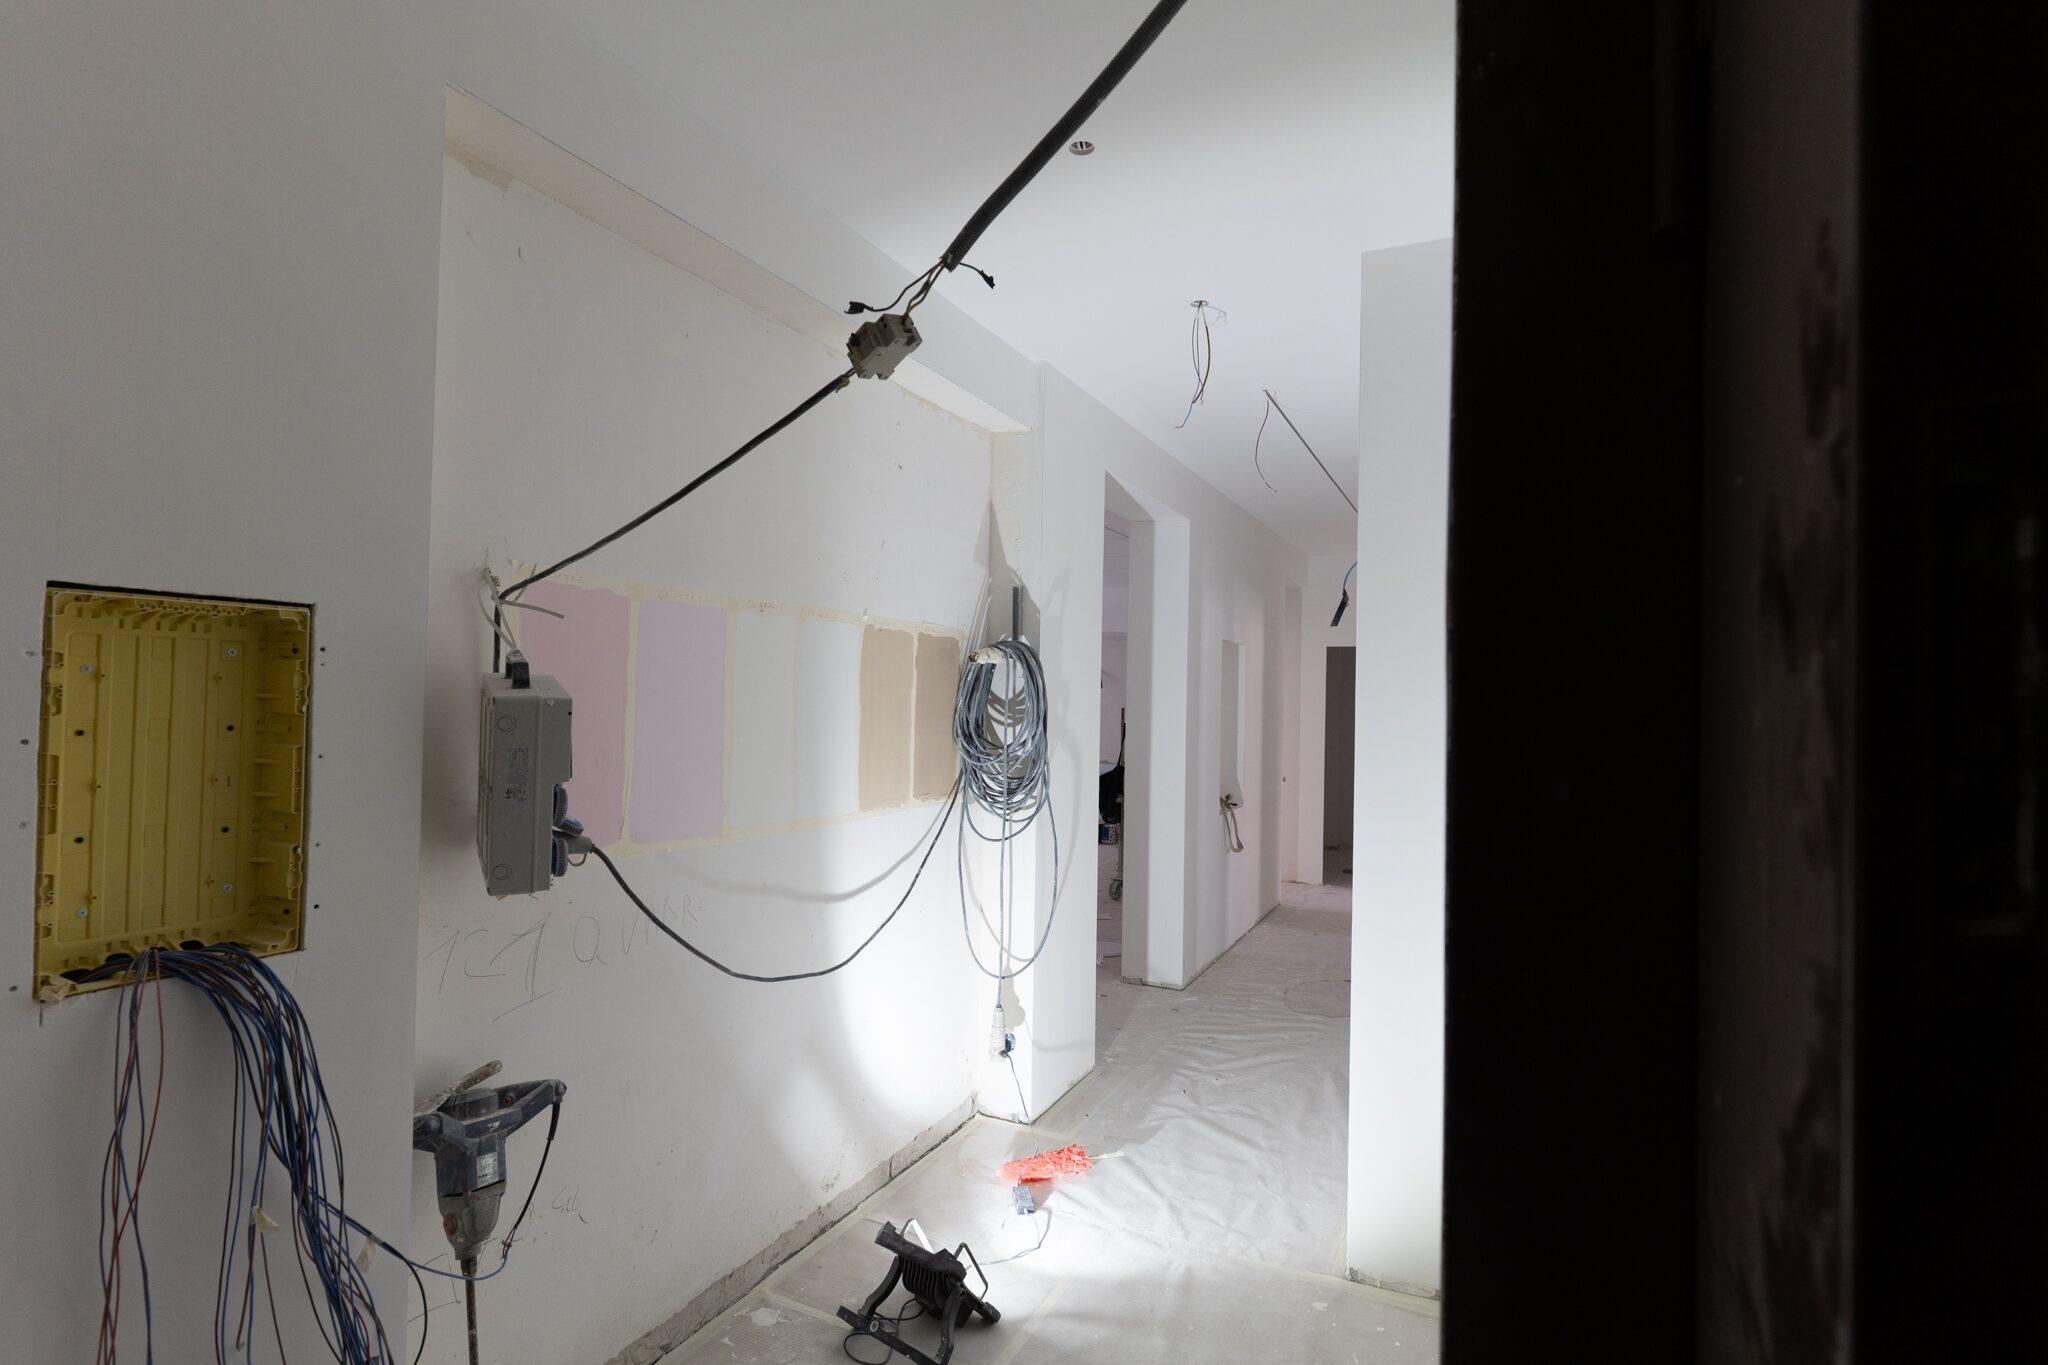
Photos of the services taken before the chases are closed (the channels cut into the walls for pipes and cables) are the ones that pay off most over the years. If you are facing an open wall, with cables and pipes running across it and the boxes in place, this is the moment: the next day it is all under plaster. For each point take two photos: a wide one, which shows which part of the room you are in, and a close one, which shows the detail. Rest a tape measure against the wall or frame the corner of the room: when the walls all look the same, you will have a reference for finding the position again.
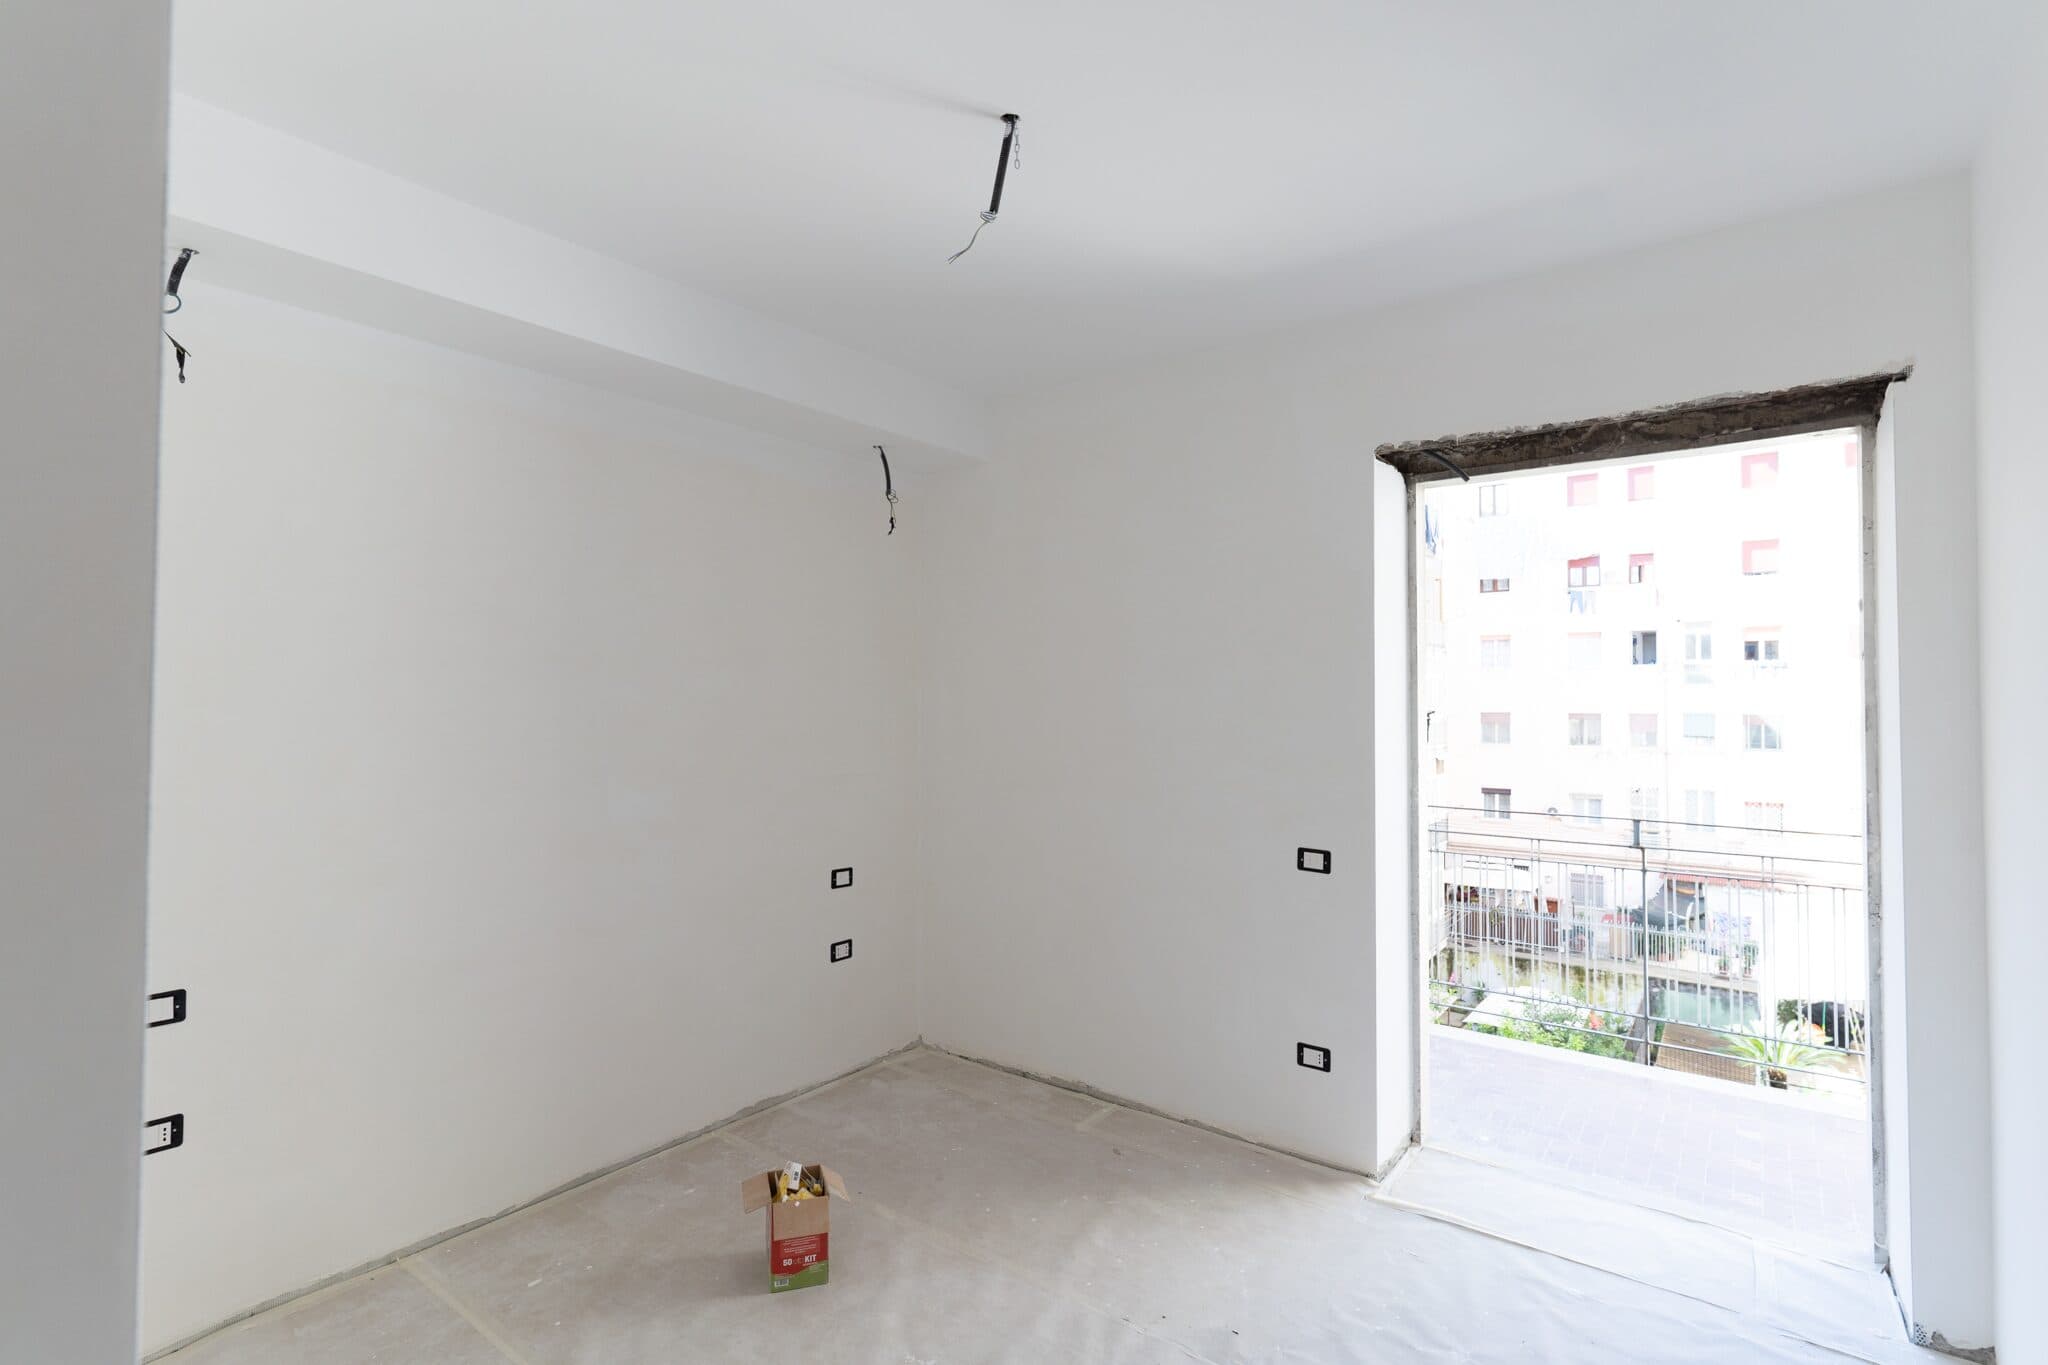
In the Casa Luna job, one photo shows a corridor with the electrical cables exposed and the consumer unit open. Whoever has to drill into that corridor one day can look at those cables before switching on the drill. Another photo shows a room at the rough stage, with socket boxes in the walls and a French window opening with nothing fitted in it.
How do you take renovation before and after photos that work?
For a before and after, choose your camera positions at the start and return to the same ones on every visit, at the same height and with the same framing. The handiest spots are the door of the room and the opposite corner. On a phone it helps to keep the previous photo open on the screen and line yourself up with a corner or the edge of a window. If you change the height even slightly, the two photos no longer overlap and the comparison loses its force.
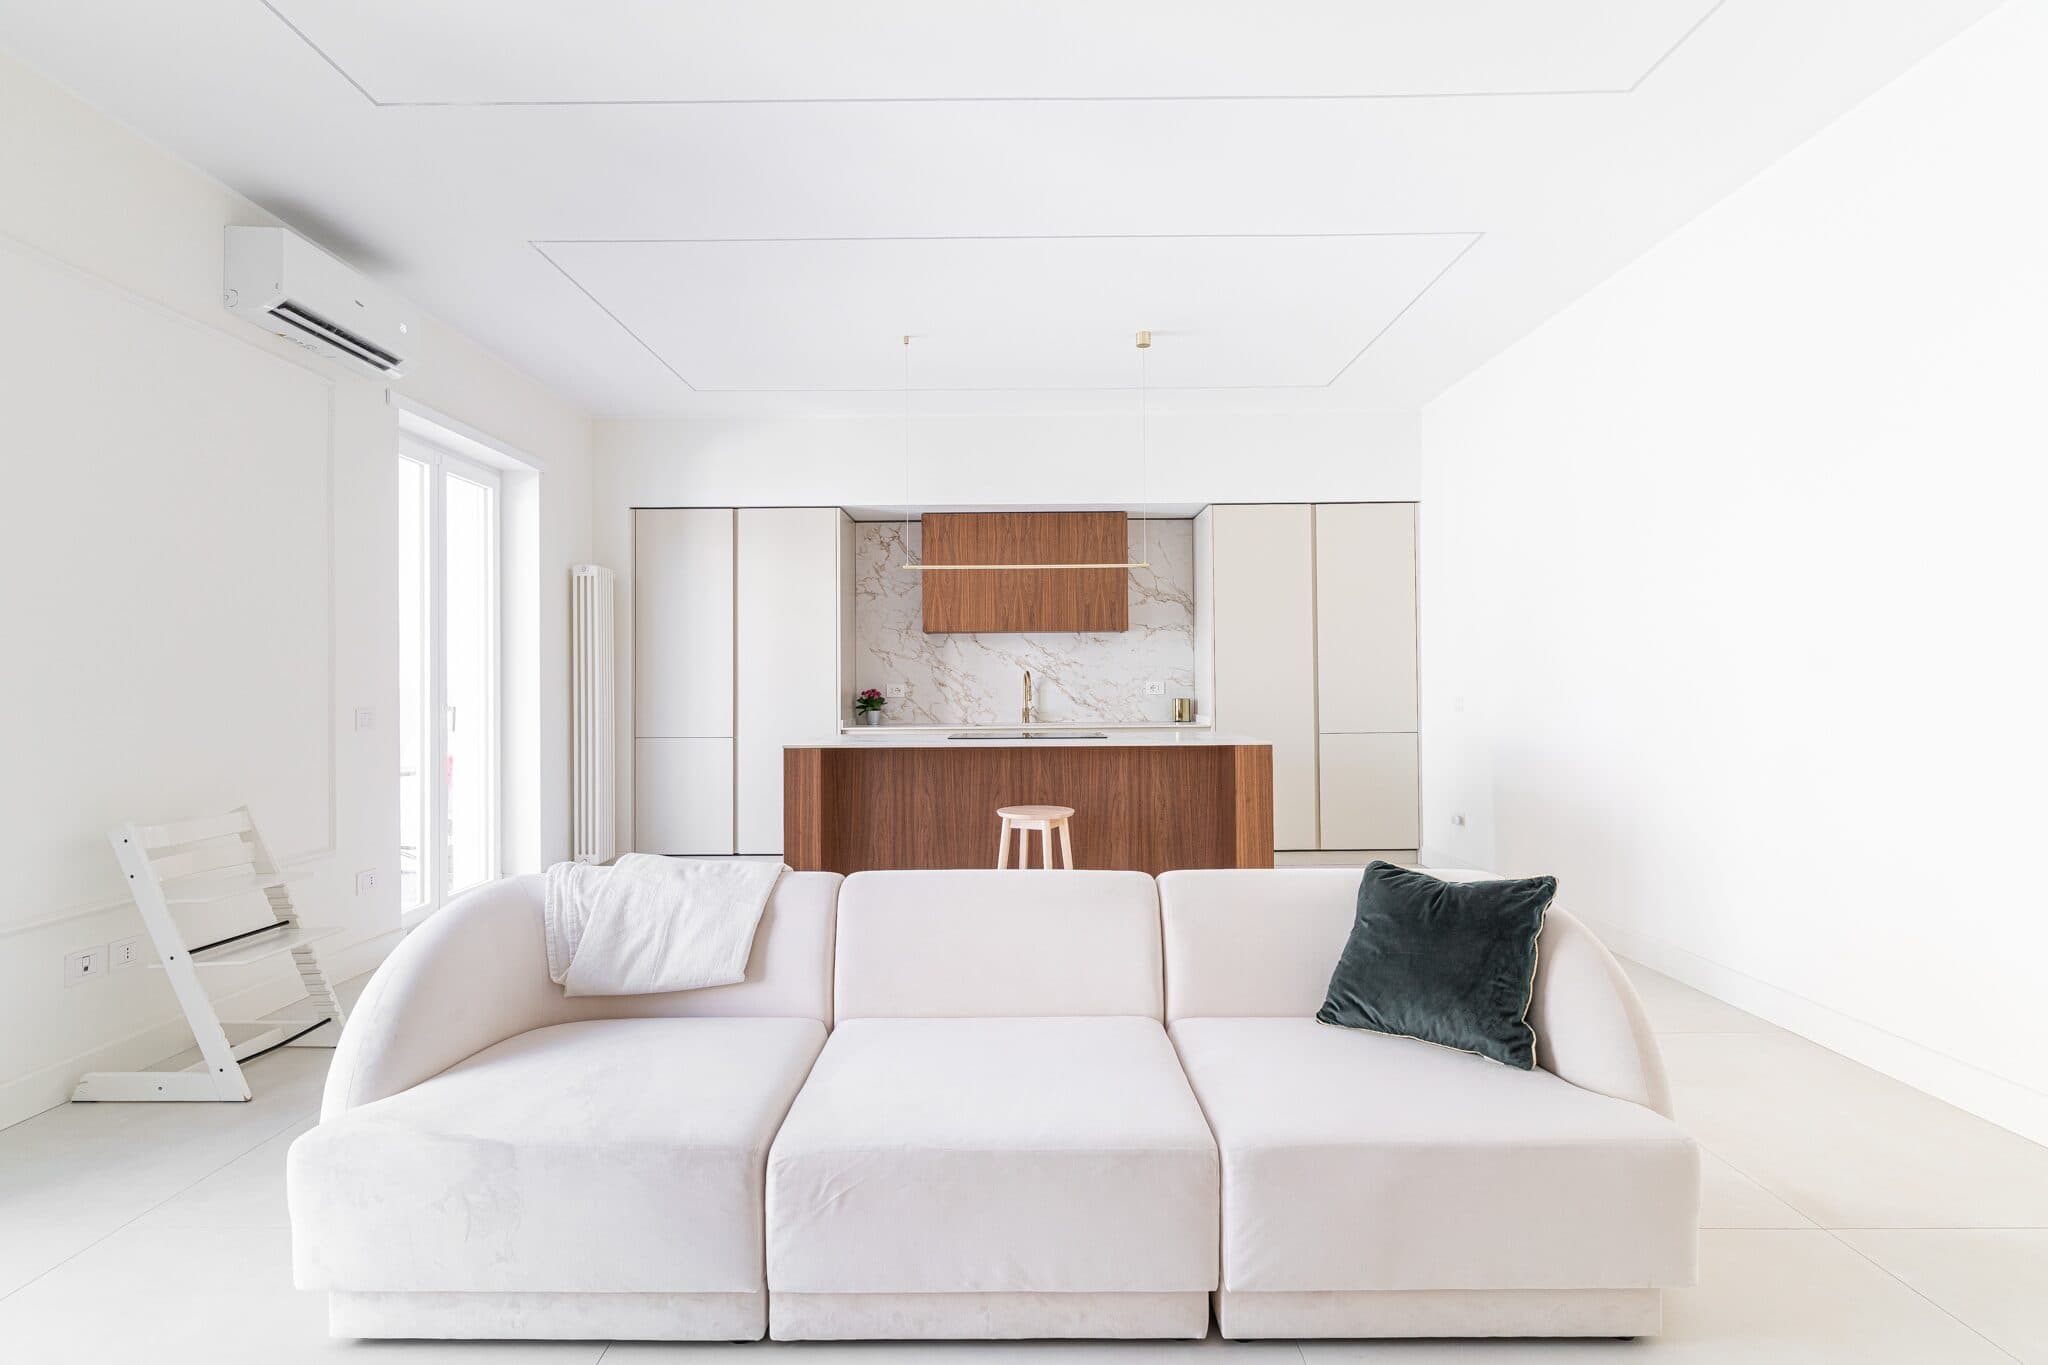
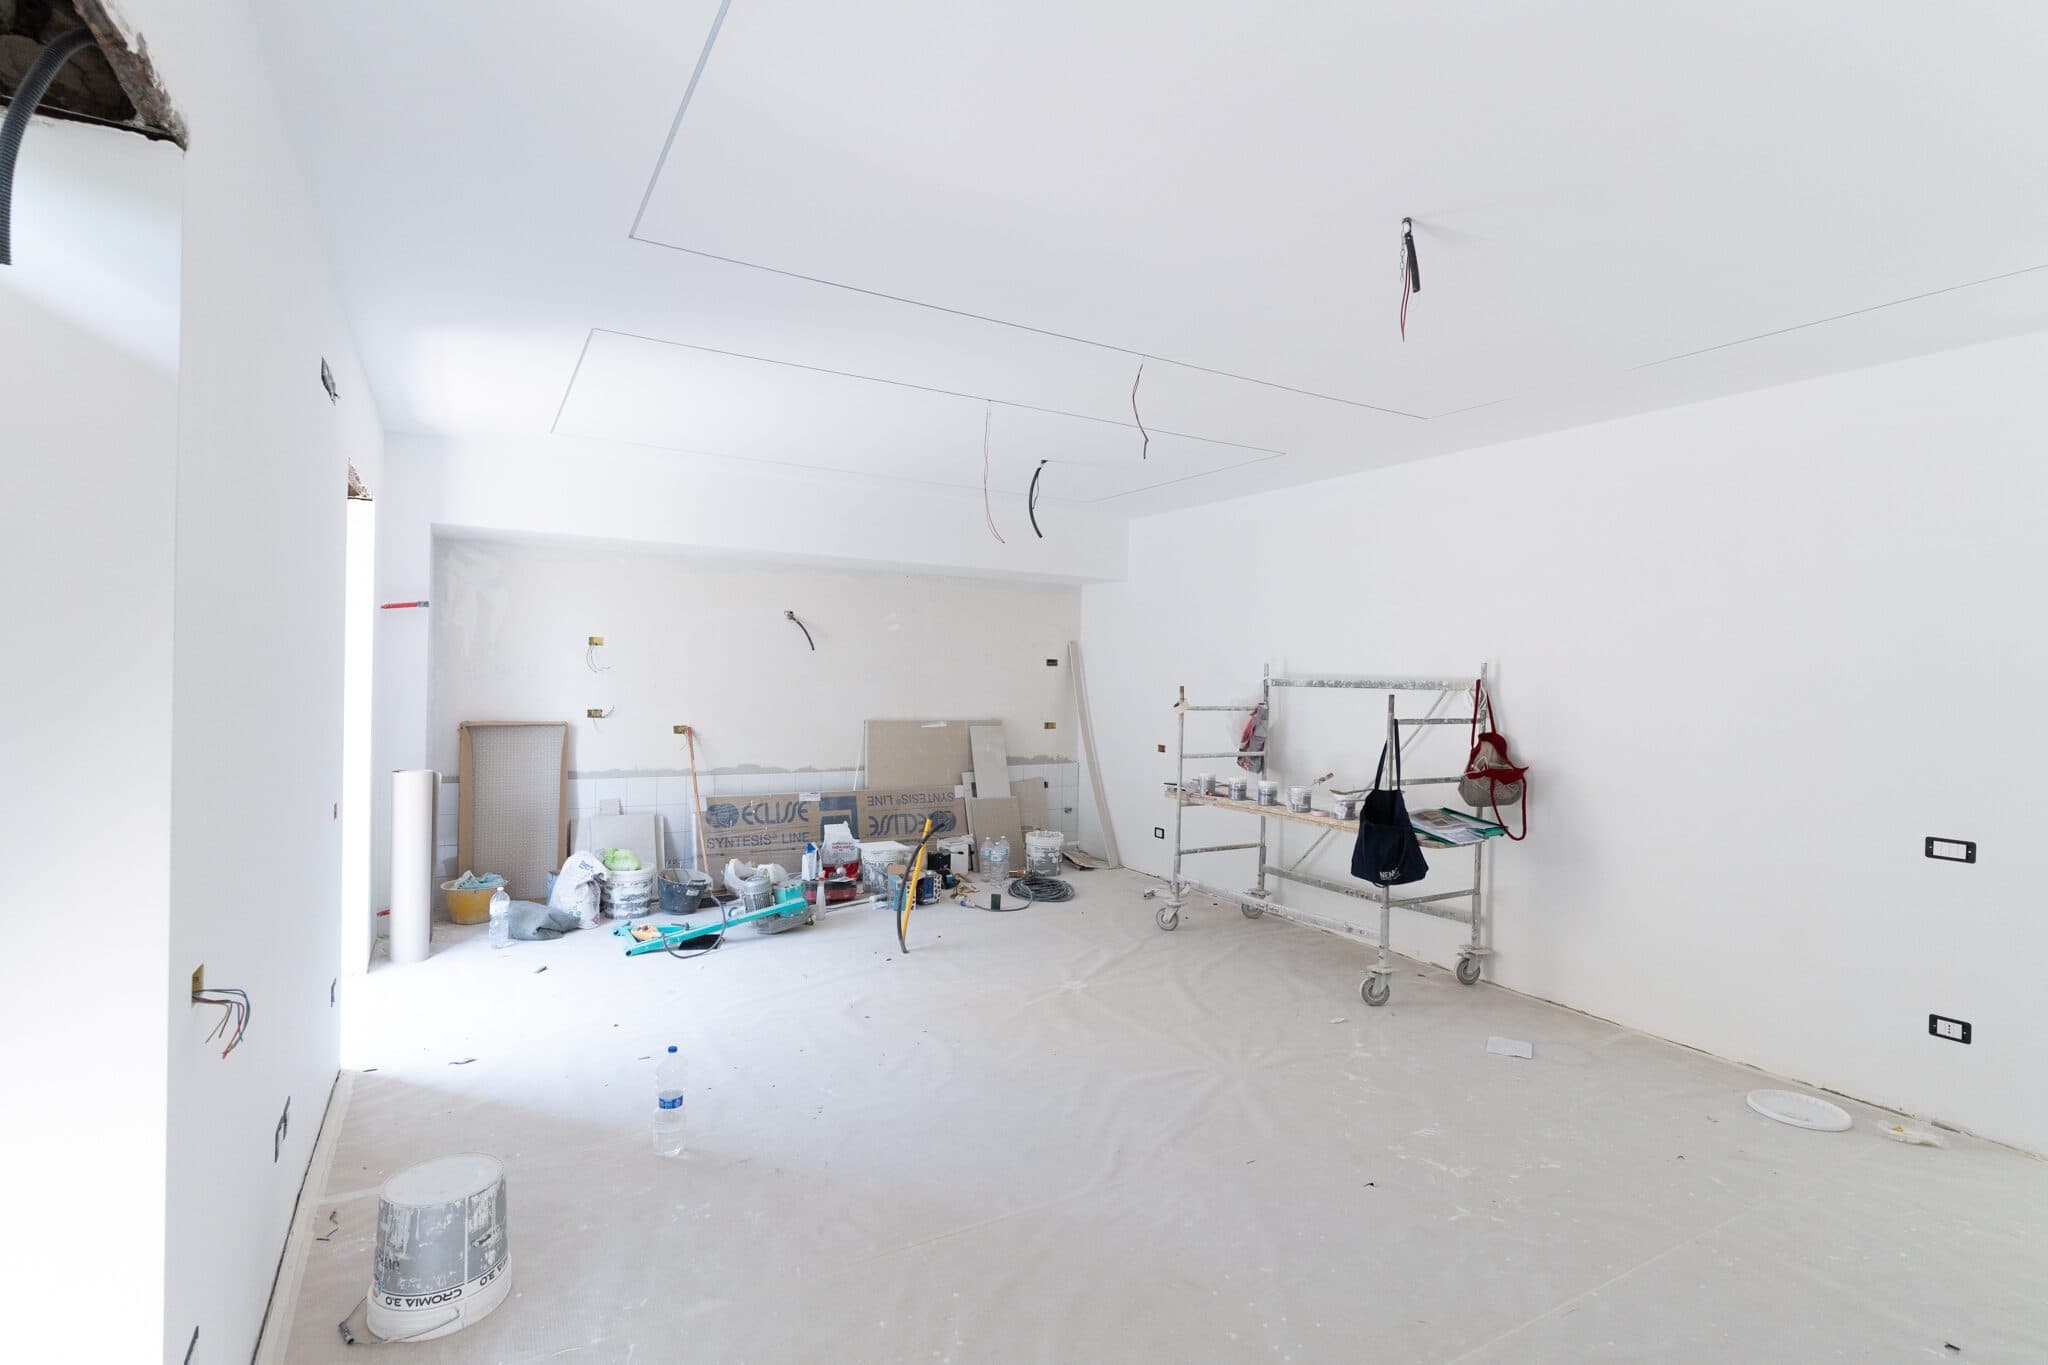
Among the Casa Luna photos there are different stages of the work, such as a wall being skimmed with the work ladder beside it. The living room appears in two photos taken from the same viewpoint. In one it is a building site, with dust sheets on the floor, wires hanging from the ceiling and a mobile scaffold tower. In the other it is finished, with a white sofa and, at the far end, the kitchen with its wooden island.
How often should you photograph the building site?
Photograph it at regular intervals and, in addition, the day before a wall, a screed or a chase is closed. Ask the builder when the closing is planned and arrange to be there. When I follow a site I normally make one visit a month, and how often is decided together with whoever is having the work done.
If you are doing it yourself, go onto the site with protective equipment and keep out of the walkways. The people working have a schedule to keep, and the photos are taken around their work: you wait for the electrician to move away from the wall, take the shot and leave the way clear again.
What are construction progress photos?
Construction progress photos go with the SAL, the progress report (in Italy, the «stato avanzamento lavori»), the document that measures what has been done: whoever reads an item can see the wall it refers to. That is why they need to be dated and tied to a room or a stage. Construction photo documentation entrusted to a photographer follows the work from start to finish without holding up the trades, and delivers dated, orderly photos, ready for the SAL and for the builder’s own communications.
How do you keep the photos so they are useful years later?
Keep the photos dated and in order, by room or by stage. A folder for each room, with a subfolder for each stage inside it, works perfectly well as long as you always use the same scheme. Check that the date stays in the file when you copy or send it, or write it into the name.
The photos are useful afterwards too: for maintenance, for whoever buys the house one day, for the builder who wants to show their work. The photos of the finished house complete the series, from interior photos to shots taken with the drone.
In a few years you will want to hang a shelf in the corridor. The wall will be smooth and white, as if there were nothing underneath. You will open the folder, look for the photo with the tape measure resting against the wall, and you will know which way the pipe runs.
FAQ
What should you photograph on a renovation site?
On a renovation site you photograph the existing state of every room before the work, and then each stage before the next one covers it, from demolition to finishings. For each point you need a wide photo and a close-up.
Why photograph the services before the chases are closed?
You photograph the services before the chases are closed because once the plaster is on, you can no longer see where the pipes and cables run. With the photo you know where not to drill when you hang a shelf or change the kitchen, and a tape measure against the wall or the corner of the room in the frame helps you find the position again.
How do you make a renovation before and after?
A renovation before and after works if every photo is taken from the same camera position, chosen at the start, with the same height and framing. On a phone it helps to keep the previous photo open and line yourself up with a corner or a window.
How often should you photograph a building site?
Photograph a building site at regular intervals, for example once a month, and on the day before a wall, a screed or a chase is closed.
How much does construction photo documentation cost?
The quote for construction photo documentation is tailored and depends on how long the work lasts, how often the visits take place and the location.
Do you also work outside Naples?
Yes, I photograph building sites throughout Italy and Europe, and the location is factored into the quote.